Friday, October 7, 2011

A small break...

from the cross stitch to tell you that I've signed up for the Handprinted Fabric Swap being hosted by the lovely Leslie of {onegirl}.


I've got a few ideas floating around my head for the design I plan to do.  I'm not sure yet if I'll stick to one design or work on a couple.  Each participant will be sending out a fat quarters to four different people so the quarters could each be unique or cut from the same length of fabric.  Choices, choices!

If anyone is interested in participating (even if you've never printed on fabric - I haven't), then go here for all the details.  Sign up is until the 21st of October.  Leslie has also provided a list of resources she has found that will help you get started and learn a bit about printing on fabric.

Gotta bust out my sketchbook and work on some designs!

Wednesday, October 5, 2011

Oops!

Missed a day of posting but I was being very productive so that counts, right?  I finished my pattern for my Desert Bus for Hope project and got started on the stitching last night.  I'm going to work a little more on it this afternoon, so to make up for my missing post I'll update again with a photo of my progress this evening.

Monday, October 3, 2011

All for a good cause...

There are a group of lovely people in Victoria, B.C. who do an insane thing every year - they drive a bus (well, the video game version) for hours on end.  While they're 'driving' the bus and generally being hilarious as they stream live video over the interwebs, they also raise money for Child's Play.  Child's Play is a charitable organization that raises money to buy books, toys and games for sick kids in hospitals across North America.  Click the link and check out their website for more info.

The guys and gals in Victoria have been running Desert Bus for Hope since 2007.  That first year they raised $22,805 which is an awesome amount.  Last year?  That number was $209,400.  How amazing is that?  This money is raised in various ways - people can offer to donate a sum of money and submit a 'challenge' to the team, or a member of the team, straight donations are accepted, and silent and live auctions are held.

This year I am whipping up a little something special to donate for one of the auctions.  I don't want to say what it is in detail but here's a little hint:


Because the people involved in Desert Bus for Hope are mostly gamers and self-confessed nerds/geeks, most (if not all) of the items up for grabs in the auctions are gaming/geekery related.  Last year there were some truly amazing pieces up for grabs - everything from clothing, jewelry, art, etc.  I recommend you bookmark the Desert Bus site and check back for the big event starting on November 18th at 6pm PST.  

The Boy is also working on a really cool item for the auction but I'm not telling about that either until closer to the day :)  We're both hoping our submissions will raise at least a few dollars for such a worthy cause. At any rate, we'll be enjoying watching the event!

Of course, I'll post again about my item when it's finished and if it turns out well, I think I might do up the pattern properly for anyone that's interested.  In the meantime, I better get stitching!

Sunday, October 2, 2011

Bits and pieces.

In amongst my fabric stash I have some lovely, soft, organic cotton flannel.  I wish I had enough of it to wrap myself in, cocoon like, and then I would just lie on the couch and watch movies throughout the fall and winter.  However, I do not have enough of it to do that but I do have plenty with which to make wee slippers/booties for babies.  Having never made any such thing before, I decided to test how difficult it is and to do that, I used this pattern by Joanna at www.stardustshoes.blogspot.com.


Turns out, small booties are very easy to make (especially when you have a great pattern to follow).  I've only made one so far but will be making up a second to match soon.  I love, love, love this linen/cotton blend robot print that I found on a trip to Seattle.  I'm not sure who it's made by but it is from Japan, if that helps.

If you're looking to make little shoes like this, I'd recommend using the pattern mentioned if you've never done it before.  It is for personal use only but I see Joanna's blog that she does offer licensing for the pattern if you're wanting to make some to sell.

In other news, I went to the September Portobello West market with my cousin (Hi, Kim!) for a lovely time of wandering and chatting.  While there I came across a stall selling these:

How cute is this?

Can you guess what's inside?
The packaging alone drew me in but the contents sealed the deal.  I've been wanting to try my hand at some needle felting and this pack seemed like a good way to start.

Bought from Honey Canada
Six colours of roving and two needles to get me started.  I have no idea what I'm going to make yet but for now I'm just happy to look at it every now and then.  If anyone knows of any blogs or sites that have good tutorials in needle felting for beginners, please let me know in the comments!

P.S. There is another Portobello West market coming up on October 30th, if you live in or will be in the Vancouver area.


Saturday, October 1, 2011

Today's post is brought to you by...

...the letter 'L'.


But I'm getting a little ahead of myself.   I had made small quilts/play mats for my two nieces in Australia back in July, each with their initial (A and E).  Sadly, I was in such a rush to get the quilts done and to pack that I completely forgot to take any photos.  I really have to ask my sibs to send me some.  

Anyway, I recently made another small quilt for my nephew (son of The Boy's little brother and his wife).  This time I got wise and took some photos as I went along.  That was partly to document the process and partly to work on my photography skills.  The mad photography skillz that I've seen on other crafting/quilting blogs blow mine completely out of the water but I know we all have to start somewhere. 

But back to the quilt.  What started as this:


Soon became this:


Which, in its entirety looks like this:

The front


And also like this:

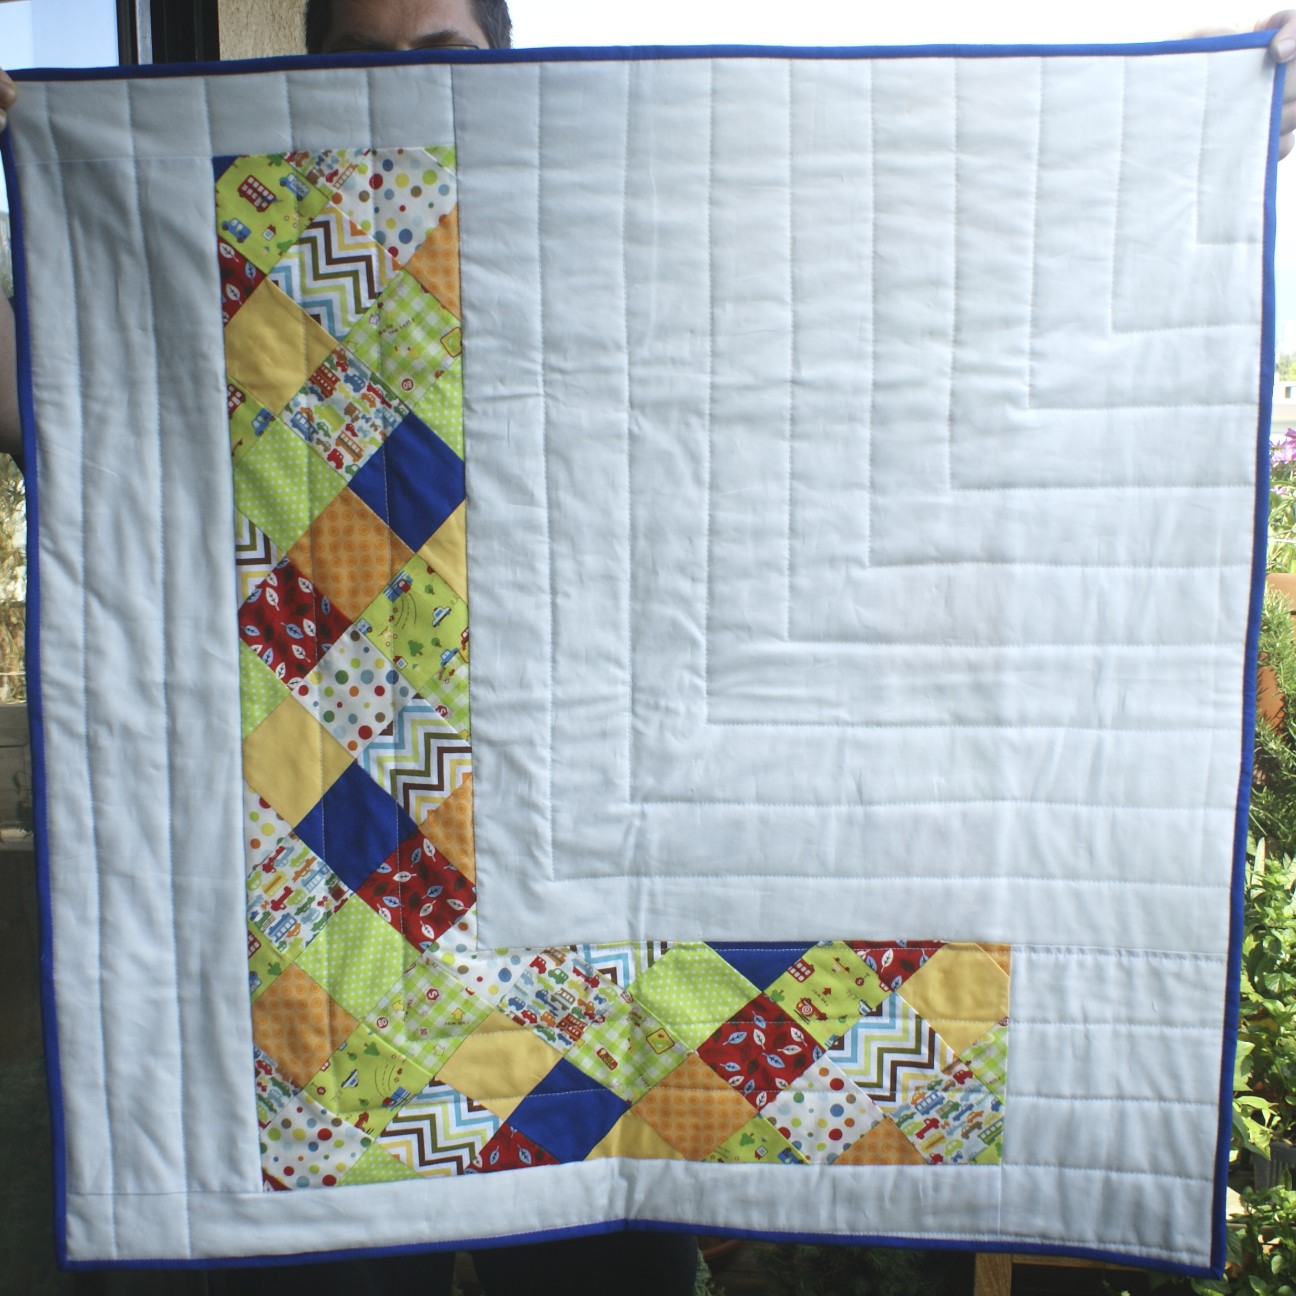
The back

As you can see, I ran out of the pale blue Kona and had to add a strip of white Kona to make the backing.  I like the two tones and the strip of colour, myself.  The photo's don't really do the colours justice (which is why I need to practice!) and I really should become better friends with my iron.

The Boy picked up a few books for little L at the comic book store to send out with the quilt.  Hopefully the little guy (and his parents!) will like it and I really hope L gets good use out of it.  I like to think that the quilts I make for little people are being dragged around and loved, curled up under and worn as capes.  The more they're scrunched, the softer they get, and who doesn't love a nice, soft quilt?


This could be madness...

...but I'm going to try posting daily on both of my blogs during the month of October as part of Blogtoberfest.

This could get...interesting but I'm going to do my best.  Naturally, the posts here will be dedicated to all things crafty - what I'm working on, what I've finished, what I wish I was working on, what I wish I had finished.  I have a few things in progress and in the pipeline so I'm thinking I have enough to keep me posting throughout the month.

If I counted this post as post number one for the month, I think that might be cheating.  So - my official first post for Blogtoberfest will be coming later in the day.  Wish me luck and check back often!

P.S.  If you're feeling motivated, or if you have a lot to say/show, why not join in the fun?  Go visit TinnieGirl for the details and the awesome button :)

Wednesday, September 28, 2011

Craft central...

Living in a one bedroom apartment can be challenging in an organizational sense at the best of times - add to that a husband, two cats and the desire to have a dedicated crafting area and it gets a little out of hand.  Originally, my crafting space was in a corner of our bedroom (which is quite large, so it wasn't such a big deal) but I was constantly having to run out to the living/dining areas so that I could use the dining table to cut fabric, or set up the ironing board in a larger area.  Lucky for me, The Boy is quite an accommodating lad and so I moved my work desk/sewing machine/supplies out into the living room.  This has meant moving my computer and small desk into the bedroom, which isn't ideal, but it takes up less space and gives me a quieter area to work in when I'm writing or blogging.


In addition to taking over more square footage in the living room, I've also taken over the hutch in the dining room, as you can see above.  This had become kind of a catch-all, so I feel good about re-purposing it for something useful and it's helped me to organize my supplies more than I have ever done before.  Oh, and see that old Underwood typewriter?  Someone had left that in the Free Stuff pile at our old building.  Can you believe that?

Fabric all in one spot!


I've also gone so far as to organize the items within the hutch.  You can kind of see a peek of the labeled boxes in the photo below.  Originally, the hutch had awful wooden handles, so I replaced those with the white and black ceramic ones that you can see in the close up.  Easy to do and the knobs were a cheap find at Paboom (great store with locations in Vancouver and Victoria - all sorts of neat things for the home at (generally) very reasonable prices).  The 'Hope' heart was an ornament attached to something else I bought and the metal owl was a gift a fellow blogger sent during a swap I participated in.


My plan is to eventually paint the whole hutch.  I'm not sure what colour yet, but I'm thinking something light - maybe a pale blue or light lemon yellow.  I know some people frown on those who dare to paint wooden furniture but this hutch is neither an antique nor a particularly expensive piece, so I really have no qualms about it.  Plus, I think if it were a lighter colour it would seem less of a hulking beast.  Summer is pretty much over in this neck of the woods, so I may have missed my opportunity to do any outside sanding/painting for this year.  No matter - gives me plenty of time to pick a colour!

Finally, we have a really atrocious photo of my new desk/sewing area set up.  I've still got a little tidying to do and still have my training wheels on when it comes to fully cleaning up after a sewing session.  Having this in the living area is forcing me to be more mindful of that.  My computer and small desk were in this spot and I just left the cork board and other pictures up.  I need to find a more aesthetically pleasing way to deal with the cords, too.  If you've got any suggestions, let me know!

For daydreaming purposes, I have a panorama shot of Melbourne as viewed from Williamstown to stare at and also a large patio window to stare out of.  I should put some plants or something decorative out on that balcony - it's not very inspiring in it's current empty state.  (We have a second balcony that has the bbq, bistro set and plants - how decadent are we with our two balconies!)

To keep me company, I also have a wee Evil Monkey and a tiny Edgar Allen Poe.  You can just seem them perched on the edge of the cork board.  Oh, and that bunting is from The Boy's birthday - which was two weeks ago.  We like to keep the party going around here.

So, that's my new space.  Not that you know what my old space looked like.  I'm hoping this new set up will make crafting a little more streamlined and hopefully that will translate into increased productivity.  I did manage to finish a new quilt last night so things are looking good!